
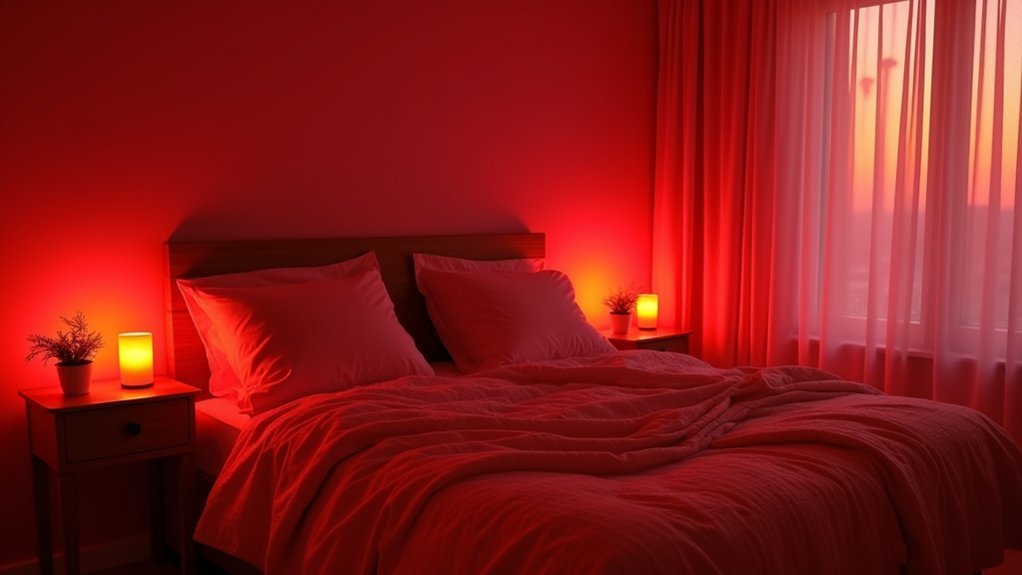
You’ll want to position your red light therapy device 15-30 cm from your body in a quiet, clutter-free bedroom corner away from bright windows. Turn off overhead lights and use blackout curtains to eliminate interference, while ensuring proper ventilation around your equipment. Schedule 10-20 minute sessions 3-5 times weekly, at least two hours before bedtime to support your circadian rhythm. Clean your device regularly and track your progress with a journal. These foundational steps will unveil the full therapeutic potential of your evening wellness routine.
Choose the Optimal Bedroom Location for Your Red Light Panel
Where you position your red light panel in your bedroom directly impacts the therapy’s effectiveness and your overall experience.
Select a quiet, private area that minimizes distractions during your therapy sessions. You’ll want adequate space to maintain the ideal 15-30 cm distance from your panel for proper light exposure.
Choose an ideal location away from bright windows and overhead lights to control ambient lighting effectively. This positioning maximizes your red light therapy benefits by reducing interference from other light sources.
Confirm your setup is near a power source to avoid extension cord hazards, and keep the area clutter-free for safety.
Consider adding comfortable seating or a yoga mat to your designated space, creating an inviting environment that encourages consistent use.
Position Your Device at the Correct Distance and Height
Proper distance and height positioning determines whether your red light therapy sessions deliver maximum therapeutic benefits or fall short of their potential.
Optimal positioning is the difference between therapeutic success and wasted sessions in red light therapy.
You’ll need to maintain 15-30 cm from your red light therapy device to targeted areas for ideal light penetration. Position the device at eye level for facial treatments or torso height when addressing back issues.
Full-body panels should mount vertically against your bedroom wall, guaranteeing setup stability while maintaining proper distance. Adjust the angle so it covers treatment areas effectively without causing discomfort.
The positioning must remain consistent throughout sessions to enhance therapeutic outcomes. Regularly verify your setup’s stability to prevent any movement that could compromise therapy effectiveness.
Proper alignment guarantees you’re receiving focused light exposure exactly where needed.
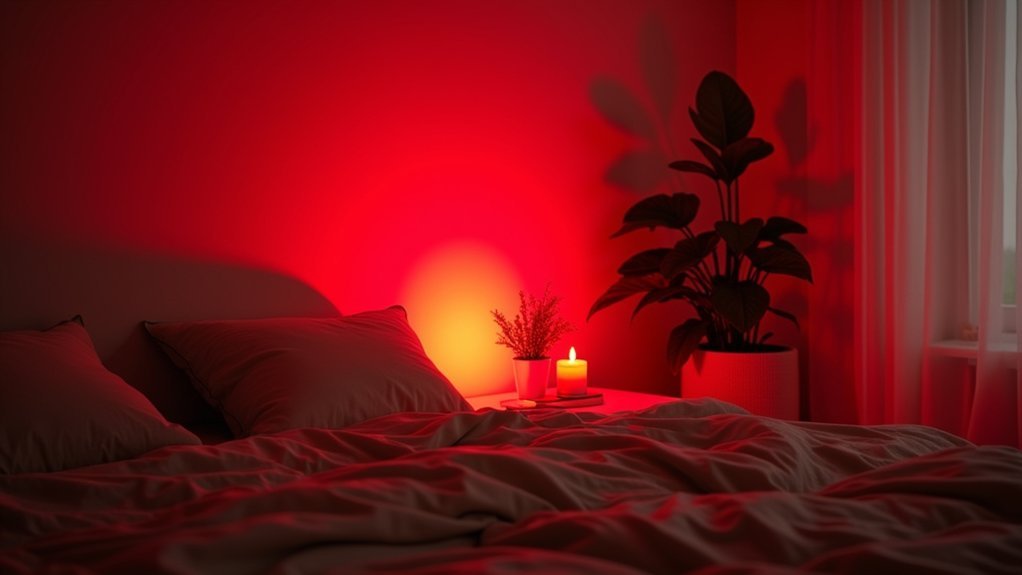
Control Ambient Lighting for Maximum Therapy Effectiveness
You’ll want to eliminate bright light sources that compete with your red light therapy device.
Turn off overhead lights, close blinds to block sunlight, and dim any lamps in the room.
Creating this darker environment allows the red light wavelengths to work more effectively on your skin without interference from other light sources.
Minimize Bright Light Sources
When bright lights compete with your red light therapy device, they greatly reduce the treatment’s effectiveness by interfering with proper wavelength absorption.
You’ll need to minimize bright light sources throughout your bedroom to create the perfect treatment environment.
Install blackout curtains to block external sunlight completely. These curtains guarantee your dimly lit room stays dark during daytime sessions.
Switch off overhead lights and bright lamps before starting therapy, as ambient lighting disrupts red light penetration to your skin cells.
Position your red light therapy device in the darkest area possible, allowing targeted zones to receive uninterrupted exposure for maximum cellular stimulation.
You can use soft, warm-toned lamps placed away from the treatment area to maintain a calming atmosphere without compromising results.
Optimize Room Darkness
Creating complete darkness takes your red light therapy optimization beyond simply removing competing light sources.
To optimize room darkness effectively, install blackout curtains or shades that eliminate all outside light penetration. This controlled ambient lighting environment maximizes your therapy’s benefits while establishing a calming atmosphere.
Schedule sessions when natural light is naturally minimal—early morning or late evening works best.
Replace harsh overhead fixtures with adjustable lamps featuring warm tones that provide indirect illumination without interfering with your red light exposure.
Enhance your setup further with light-blocking materials like sleep masks or eye covers. These accessories guarantee complete darkness even if residual light sources remain.
You’ll create an ideal therapeutic environment where your red light therapy can perform at peak effectiveness, delivering maximum benefits for your wellness routine.
Ensure Proper Ventilation and Safe Power Access
You’ll need adequate airflow around your red light therapy device to prevent overheating that can damage the unit and reduce its effectiveness.
Place your device near a reliable wall outlet to avoid extension cord hazards that create tripping risks and electrical dangers.
Check your power cords regularly for wear and consider surge-protected power strips to safeguard your investment while maintaining easy outlet access.
Ventilation Requirements Setup
While red light therapy devices generate significant heat during operation, proper ventilation becomes critical for both device longevity and your safety. You’ll need to create a well-ventilated setup that promotes ideal airflow around your therapy device. Position your device away from enclosed spaces and guarantee adequate cooling through strategic environment planning.
| Ventilation Factor | Requirement | Benefit |
|---|---|---|
| Room airflow | Open windows/fans | Prevents overheating |
| Device spacing | 15-30 cm distance | Enhances cooling |
| Area maintenance | Regular cleaning | Removes dust buildup |
| Air circulation | Multiple ventilation points | Maintains comfort |
You’ll want to incorporate ventilation features like window openings or fans to maintain air circulation during therapy sessions. Regular inspection and cleaning prevent dust accumulation that might obstruct your device’s cooling system.
Power Source Safety
Since electrical safety forms the foundation of any red light therapy setup, you must position your device within reach of a dedicated power outlet to avoid extension cord hazards. Choose a reliable power source that can handle your device’s wattage requirements without overloading the circuit.
Conduct regular inspection of power cords for fraying, damage, or wear that could compromise safety during sessions. Remove clutter from your therapy area to prevent tripping hazards and guarantee clear access to controls and outlets.
Maintain proper ventilation around electrical components to prevent overheating, which affects both device performance and safety. If you’re using multiple devices simultaneously, verify your outlet can support the combined electrical load to prevent dangerous power issues.
Create a Relaxing Atmosphere With Minimal Distractions
Creating the right environment transforms your red light therapy sessions from routine treatments into restorative experiences that calm both mind and body.
Transform your red light therapy from a simple routine into a deeply restorative experience for mind and body.
Your therapy area should promote deep relaxation while eliminating distractions that interfere with your wellness routine.
Here’s how to optimize your space:
- Choose soft, indirect lighting that won’t interfere with your red light therapy while maintaining a calming atmosphere throughout your bedroom.
- Designate a quiet corner away from noise and interruptions where you can focus completely on your treatment without external distractions.
- Add comfortable seating like a cushioned chair or yoga mat to encourage proper positioning and enhance your overall relaxation during sessions.
- Incorporate aromatherapy with essential oils or diffusers to create a soothing sensory experience that complements your therapy.
Establish a Consistent Evening Therapy Routine
Although red light therapy offers impressive benefits, you’ll only experience lasting results when you commit to a regular schedule that works with your body’s natural rhythms. Consistency forms the foundation of effective treatment, so aim for 3-5 therapy sessions weekly, lasting 10-20 minutes each.
Schedule your sessions at least two hours before bedtime to support your circadian rhythm and enhance sleep quality. Integrate red light therapy into your existing evening activities—perhaps before reading or meditation. This creates a natural shift toward relaxation.
Establish a calming ambiance during each session with soft lighting, comfortable seating, and gentle music. Track your progress by documenting changes in sleep quality, mood, and overall well-being.
This routine transforms therapy sessions into a cornerstone of your nightly wind-down ritual.
Maintain Your Equipment for Long-Term Performance
When you invest in red light therapy equipment, proper maintenance guarantees peak performance and extends your device’s lifespan.
Keeping your therapy device at home in prime condition guarantees you’ll continue experiencing long-term effectiveness from your treatments.
Here’s how to maintain performance properly:
- Regular cleaning – Wipe your red light therapy device with a soft, damp cloth to remove dust and oils that block light penetration and reduce treatment quality.
- Inspect power cords – Check for damage or wear to guarantee safe operation and prevent electrical hazards during your sessions.
- Proper storage – Keep equipment in well-ventilated areas to prevent overheating and maintain efficient operation.
- Follow manufacturer’s guidelines – Adhere to recommended usage and maintenance instructions for prime longevity and effectiveness.
Frequently Asked Questions
How to Make Red Light Therapy More Effective?
Position your device 6-12 inches from clean skin, maintain 3-5 weekly sessions lasting 10-20 minutes each, eliminate ambient lighting distractions, and track your progress through photos to optimize results.
How to Use Red Light Therapy to Improve Sleep?
Use red light therapy 2-3 hours before bedtime for 10-20 minutes. Position your device 12-36 inches away, create a calming environment, and maintain consistent sessions 3-5 times weekly to regulate circadian rhythms and boost melatonin production.
What Is the Best Setting for Red Light Therapy?
You’ll achieve ideal results by positioning your device 12-24 inches away, using 660nm red light or 850nm near-infrared wavelengths, treating for 10-20 minutes, and maintaining consistent sessions 3-5 times weekly.
How Long Should I Sit in a Red Light Therapy Room?
You should sit in a red light therapy room for 10 to 20 minutes per session. Don’t exceed 20 minutes, as longer exposure won’t improve results. Maintain 6 to 12 inches distance from the device.
In Summary
You’ve got everything you need to transform your bedroom into an effective red light therapy space. By following these seven setup tips, you’ll maximize your treatment benefits while creating a comfortable, relaxing environment. Remember, consistency is key – stick to your routine and maintain your equipment properly. With the right location, positioning, and atmosphere, you’ll be well on your way to experiencing the full potential of red light therapy in your own bedroom sanctuary.


Leave a Reply